
The Best Way To Get Crispy Chicken Skin (A Tip You'll Need for Your Thanksgiving Turkey)
I tested four different methods to find the very best one. This tip applies to turkey, too!
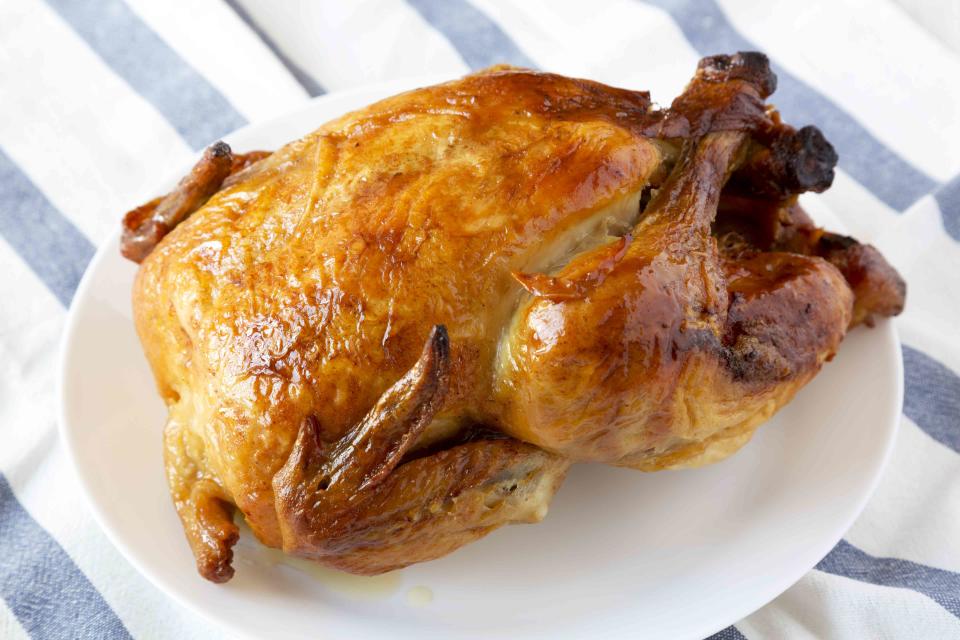
Simply Recipes / Getty Images
I’ve been wrist deep in the business end of chickens all week. I’m on a quest to determine the best way to achieve perfect deep, golden, crispy skin for everyday roast chickens.
Why? A well-roasted bird makes an undeniably beautiful presentation. Also, the snap of salty, crisp skin with each tender morsel of meat is a little bite of heaven. In the end, I want a bird with tender, flavorful meat, and deeply golden, crispy skin. I tested four different techniques to evaluate their effectiveness.

How I Tested Methods To Get Crispy Chicken Skin
Here are the four methods I tested:
Dry the bird with paper towels, then roast
Rub with baking powder mixture
Air-dry for 24 hours
Air-dry and baste during roasting
To ensure accurate results, I applied a few standards to all the chickens. First, all the chickens were between five to six pounds. Two were from the supermarket, and two were from a farmer down the street from my house. All chickens were trussed and set on the counter to come up to room temp for 30 minutes before I popped them in the oven.
For this test, I was most concerned with the crispness and color of the skin, so I didn’t worry about the flavor of the chicken until the end, adding herbs or stuffing the cavity. However, I still wanted the chicken to taste good, so except for Chicken No. 2 (see below), I seasoned each one with 2 teaspoons of kosher salt, 1 teaspoon of freshly cracked pepper, and 1/2 teaspoon of dried thyme.
All the birds were roasted in a sheet pan lined with parchment with a wire cooling rack placed on top. This allows air to circulate under and around the chicken, similar to roasting a turkey in a roasting pan with a roasting rack. I roasted the chickens on the second lowest rack in the oven and used Ina Garten’s recommendation for cooking time: 1 hour and 30 minutes at 425°F for each bird.
The Rundown
Chicken No. 1: The Quick Pat Down
This first chicken served as my control. It required the least amount of effort and still provided some level of crisp skin. I simply patted this chicken dry with paper towels, then rubbed it with two tablespoons of olive oil on the outside of the skin, under the skin, and inside the cavity of the bird. I combined the salt, pepper, and thyme together then rubbed the spice blend in all the same places.
The result after roasting was lightly golden, slightly crisp skin. Basically, consider this bird the "I don’t have any time, but it’s cool, I can still pull off dinner" bird. You aren’t going to win any awards for this one, but it still gets the job done.

Chicken No. 2: Baking Powder Rub
This was a technique I pulled from Serious Eats, and the author swears by using baking powder to achieve a super crispy chicken.
This chicken was rubbed down in a mixture of 1 tablespoon of salt, 1 teaspoon of baking powder, and 1/2 teaspoon of cracked pepper, then left uncovered in the fridge for 18 hours.
This chicken definitely had some crackling skin, but some parts looked a bit leathery and the color was actually lighter than the first bird. The meat was tender and flavorful, but there was a very slight, subtle metallic flavor from the baking powder.
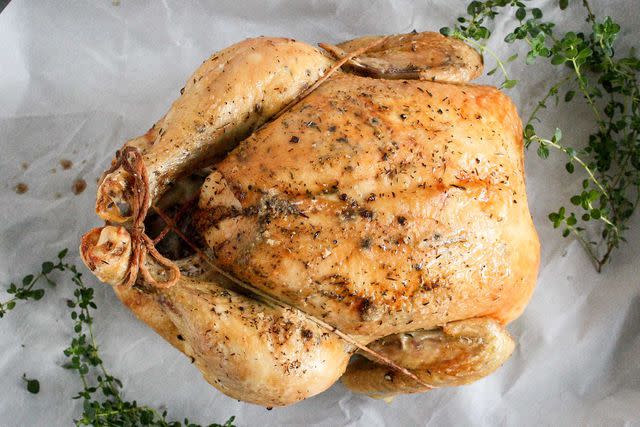
Chicken No. 3: The 24-Hour Chill
I left Bird Number 3 uncovered in the fridge to air-dry for 24 hours, following the technique espoused by Thomas Keller and several other chefs. Then, I used the same combination of oil, salt, pepper and thyme I used for Chicken Number 1 to season and assist crisping the skin just before putting it in the oven.
This attempt yielded a beautiful golden color and nice, crispy skin. The flavor of this bird was the best of those I'd tested so far. The meat was tender and not dry, but trying to season the bird under the skin after air drying proved difficult. More on that later.
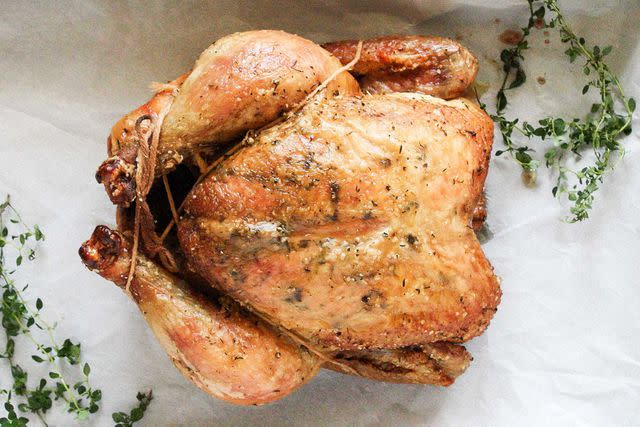
Chicken No. 4: Because I’m All About that Baste, about that Baste.
To baste or not to baste, that is the question! My editor and I both read various accounts debating the merits of basting, so we felt it was worth the time to put this method to the test.
I prepared Chicken Number 4 exactly as I prepared Chicken Number 3. The only difference was that I basted the chicken during roasting using the pan drippings. I don’t even have a proper baster, I just used a large spoon to scoop up and drizzle that chicken in all the fat it was working so hard to burn off.
I didn’t want this one to win because I don’t like things that require more work, but Grandma knew what she was doing. I basted the chicken every 20 minutes during the 1 1/2 hour roasting time, and it was gorgeous.
This bird had a deep brown color, and the skin was nice and crisp. It was the obvious winner.

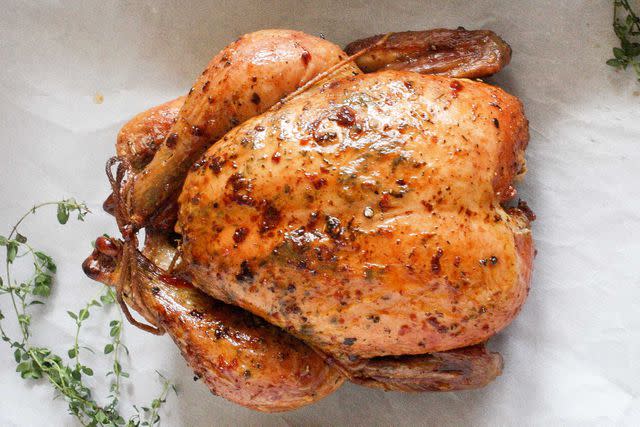
Chicken No. 5: Bonus Bird!
I now knew that air-drying and basting created a beautiful bird, but trying to season a bird under the skin after drying it for 24 hours wasn’t the easiest. I took the time to test one more chicken, this time seasoning it before air-drying instead of after.
For Bird Number 5, I created a paste of salt, pepper, thyme and one tablespoon of olive oil, and rubbed it on top of and underneath the skin. Then I left it uncovered in the fridge to dry for 24 hours. Just before roasting, I rubbed the outside of the skin with 1 tablespoon of olive oil. I then basted it every 20 minutes as it cooked.
The result was a chicken that was easy to season, had deep richly colored, crisp skin, and tender flavorful meat. Visually, it looked exactly the same as Bird Number 4, but the flavor was much better.
The Winning Method for Crispy Skin
I’m a big believer in the "less is more" philosophy in the kitchen, so if I could make a perfectly beautiful, and delicious bird without too much fuss, then that's a win for me. Unfortunately, that’s not exactly how this test turned out.
If you want the crispiest, most golden skin on your bird, the best way is to rub it with oil and spices under and over the skin, then leave it uncovered in the refrigerator for 24 hours. Rub it down with one more tablespoon of oil just before putting it in the oven, sprinkle with a bit more salt and pepper. Roast and baste the chicken every 20 minutes.
Still, each method produced at least some color and a bit of crispness, so even on your least motivated day in the kitchen, you can make a decently crispy, golden chicken. The exact method you use depends on how much time you have and how loyal you are to crispy skin.
Sometimes, a little bit of planning and extra effort is well worth the payout.
Read the original article on Simply Recipes.

