
This “All Brown” Kitchen’s Makeover Looks So Stunning, You’d Never Guess It Was IKEA
Even if your kitchen reno price tag is in the tens of thousands of dollars, there are ways to pinch pennies here and there. Homeowner Jenny McRae knew going in that her kitchen renovation would involve “a lot of structural fixes” and that her total would be around $55,000, but she did do several things, like opt for IKEA cabinets and install her own wallpaper to save money where she could.
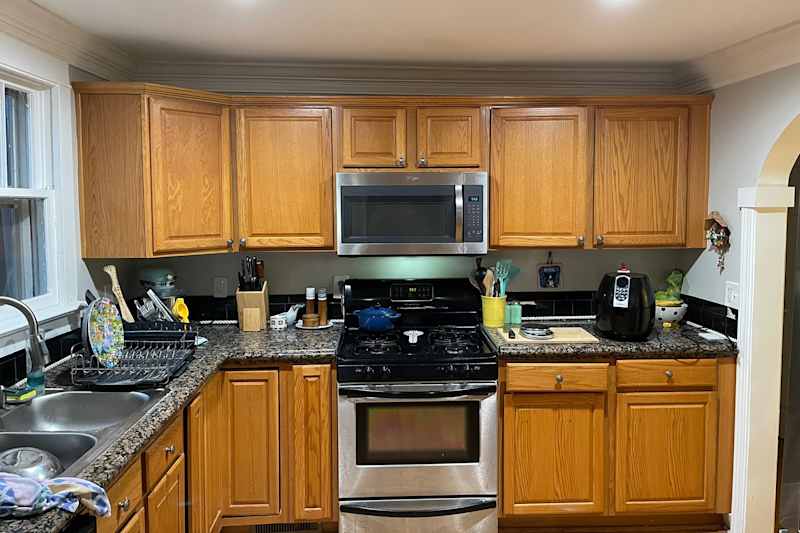
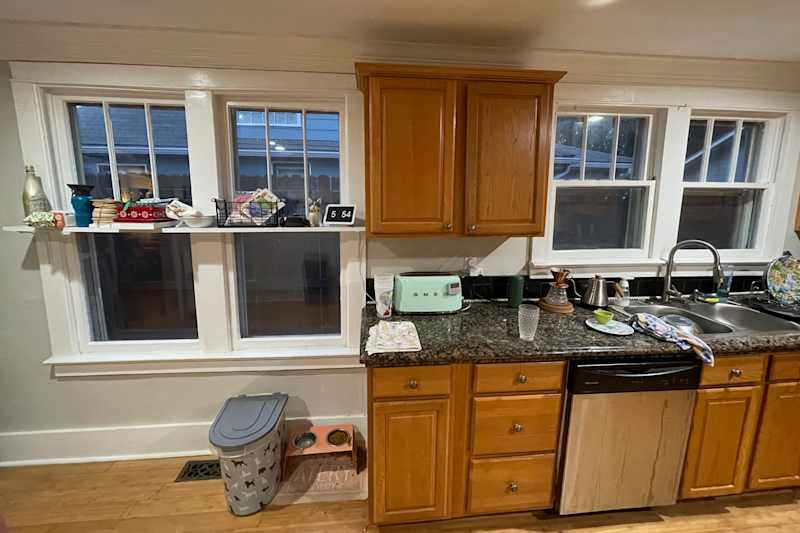
Her One Room Challenge kitchen project takes an “early 2000s kitchen … very reminiscent of the time” and turns it into a stunner.
“I wanted to update the kitchen to better reflect my personal style and make the kitchen feel more appropriate to our home,” Jenny says. (You can see another one of her projects here.) “I love color and design and wanted a brighter, happier space that felt like it could be original to the home.”
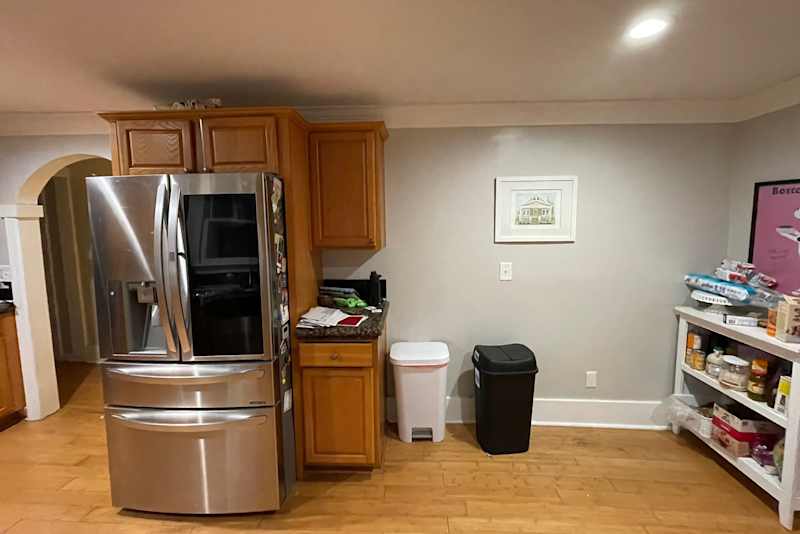
Plus, the kitchen was in need of an upgrade from a logistical standpoint: “Since the early 2000s update, the refrigerator and dishwasher had both leaked for years,” Jenny says. “The floor was sagging, and a lot of structural updates needed to be done. We also wanted more function, more cabinets, and a pantry!”
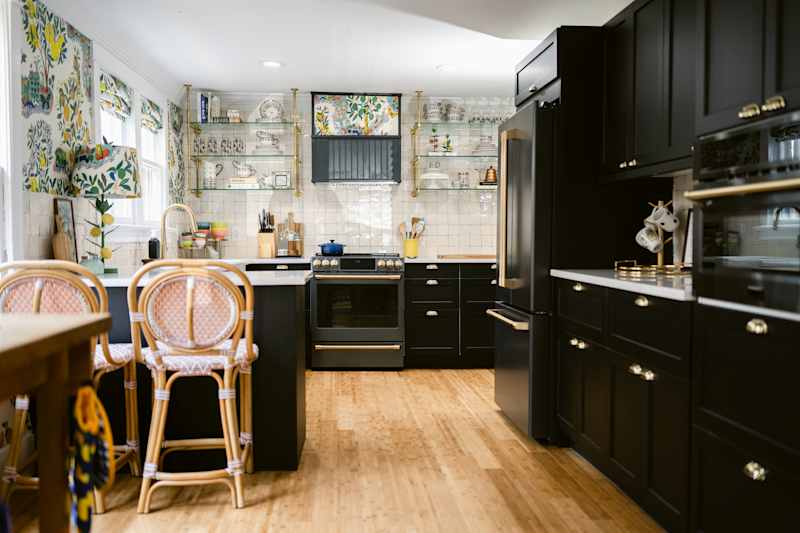
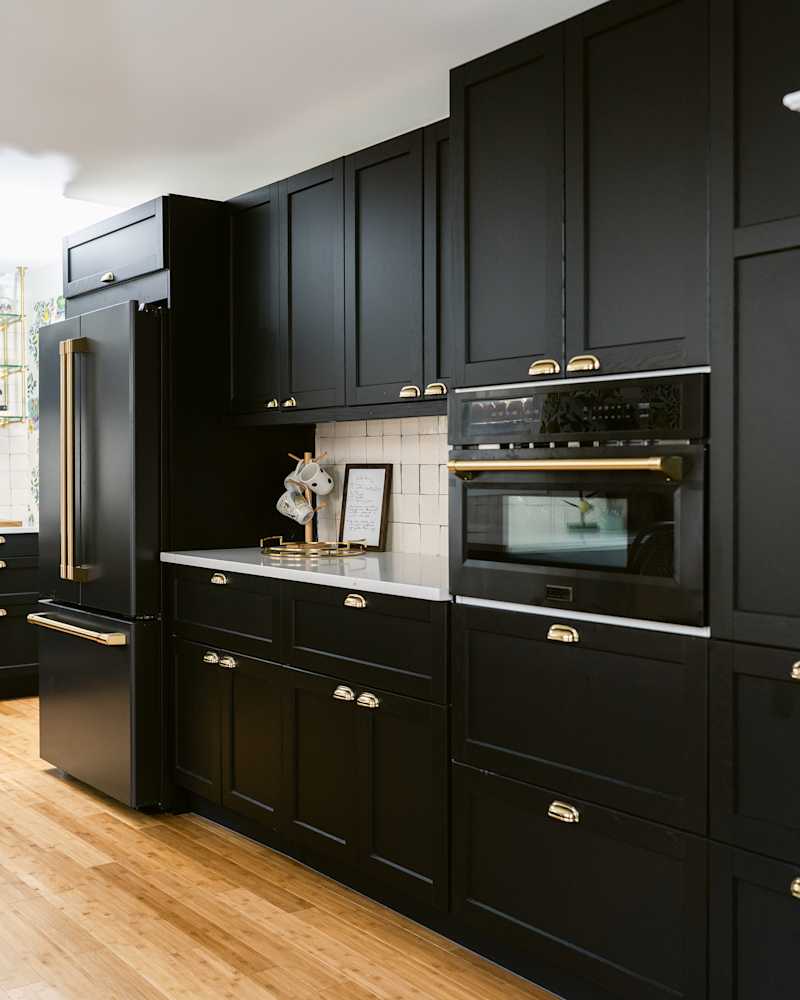
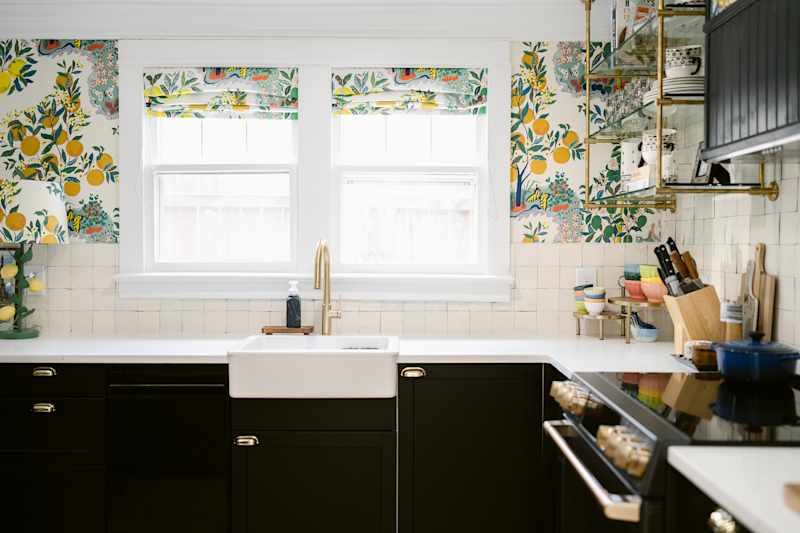
Black IKEA cabinets modernize the kitchen.
Jenny and her husband, Will, consulted professionals for many parts of the project, including contacting an IKEA kitchen planner to help with the layout. “We had a lot of water damage from previous homeowners (similar to our bathroom!) and had to have a full structural fix underneath our house,” Jenny says. “We had several beams and all of the subfloor replaced. Besides the floor and structural fixes, we also hired professionals for the tile, electric work, cabinet installation, and a few other general fixes.”
She and Will did assemble the dark black cabinetry (no paint necessary) themselves, and their cabinet total came to about $12,000 — less than half of what they were quoted for custom cabinets in the kitchen.
“We knew we wanted a pantry and to have a whole wall of cabinets on the refrigerator wall,” Jenny says. “We were also able to add a small peninsula that has given us so much extra counter space. Working with the IKEA kitchen planner was fairly easy; ensuring accurate measuring was probably the hardest part … It’s hard in an old home!” (Although it was last updated in the early aughts, the home was actually built in 1907.)
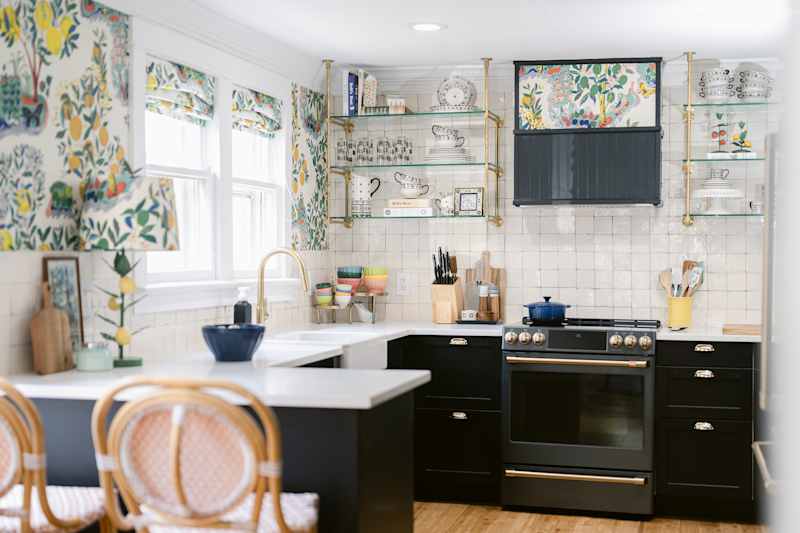
The glass shelves and fluted hood make a design statement.
Another area where Jenny and Will saved money was on the new hood. “I wanted the hood vent to be a statement piece that really ‘summarized’ the kitchen design as a whole,” Jenny says. “I designed the hood vent myself and asked our carpenter to build it … Once it was built, I painted the bottom half black and added the wallpaper on top myself. I only had to pay for the materials and labor cost, since I used extra wallpaper and paint I already owned. This cost way less than buying a larger pre-made ornate hood vent.”
The open shelving also add design flair and uniqueness that wasn’t there before. They “make a huge difference in making the room feel larger,” Jenny adds.
The wallpaper was a DIY job.
The same wallpaper that’s on the new hood decorates the left-hand wall of the kitchen; it’s a Shumacher print. “I picked this wallpaper, because it’s an historic print even older than our house,” Jenny says. In hindsight, she says she might go with something a little more wallet-friendly if she were doing the project over again.
“I LOVE the wallpaper I chose, but it was a splurge,” she says. “I ended up needing more than originally purchased and ended up spending quite a bit of money.”
The homeowner got creative when it came to the tile backsplash.
Another place Jenny thought she’d made a design mistake was the backsplash. She’d never worked with zellige tile before and picked a white grout that she didn’t love. “I thought it looked like toothpaste and really took away from the natural color of the tile,” she describes. “I was so scared I had ruined the kitchen! I purchased a colored grout sealer from The Home Depot and went over every grout line with a toothbrush all by myself to make the grout lines darker. It took a while, but I’m so glad I did it. The darker grout really makes the handmade element of the tile stand out, in my opinion.”
Now, it’s a detail she loves, just like the DIY lampshade she made with wallpaper, the brass hardware, her new Anthropologie dishware collection, and the butcher block, which once belonged to her grandmother. “The kitchen looks exactly like I pictured in my head,” Jenny says.
This article originally published on Apartment Therapy. See it there: This “All Brown” Kitchen’s Makeover Looks So Stunning, You’d Never Guess It Was IKEA
Further Reading
We Tested 5 Ways to Get Slime Out of a Carpet and the Winner Left No Trace

